
If you want your lawn to be green and thick, you’re not alone. Everyone wants their lawn to look as lush as possible, but a lot of people don’t understand what goes into making it happen.
The key is to make sure your lawn is as healthy as possible by giving it everything it needs to thrive.
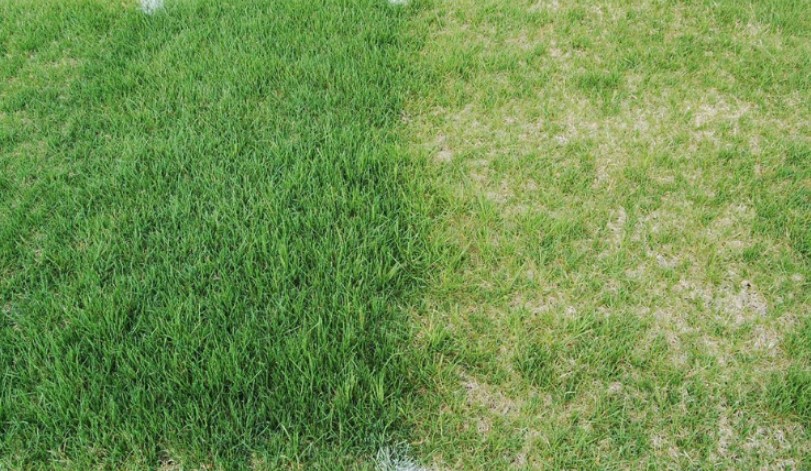
Transforming a thin, brown, patchy lawn into something that will make the neighbors jealous does take a bit of work, but it’s not complicated. Here’s what you need to do to make your lawn greener and thicker.
Table of Contents
1. Check the Quality of Your Soil
Some people just choose a fertilizer, apply it to their lawn, and then wonder why they aren’t getting results. The truth is that before you can properly fertilize the lawn, you have to know what’s going on in the soil.
Soil testing is one of the best things you can do to encourage thick, green grass. The health of your lawn often depends on the pH of the soil. Soil pH is measured on a scale of 1 to 14. Seven is neutral. If the result is lower than 7, your soil is acidic. If it’s higher than 7, your solid is alkaline.
A soil test also determines what minerals and elements are missing so you know if you need to replace anything. Soil testing kits are available at most garden stores, and you can buy them online. You can also find testing meters that are inserted into the soil and immediately give you a pH reading.
Most soils in the Pacific Northwest and the eastern U.S. are naturally acidic. A lot of diseases and weeds prefer acidic soil, so it’s an important thing to identify and correct if you want a healthy, thick green lawn.
To reduce the acidity of acidic soil, adding lime is recommended. This is a long process, though, and not something you can fix overnight. The best time to start the process is in the fall to improve the problem before summer, but you can do it at any time of the year. As a bonus, lime also contains magnesium and calcium, which can also improve lawn growth.
Most soils in the southwest and the central U.S. are alkaline, mostly because these areas don’t see as much rain. When the soil is alkaline, plants have a harder time absorbing nutrients. This means that, even if you add fertilizer, your grass might not be able to use it appropriately.
To improve alkaline soil, add a soil conditioner that contains sulfur. Sphagnum peat moss is commonly used because it’s a natural option, and organic composting can be effective if added to the soil regularly.
Once you’ve made the necessary adjustments, you’re ready to move onto the next step.
2. Overseed Your Lawn
Overseeding is the process of adding new grass seed to an existing lawn to fill in gaps and make the lawn thicker. This is something professionals do regularly and it delivers impressive results. In the north, the best times to overseed are in the fall and spring; in the south, it’s late spring.
Note that overseeding is likely to be more successful if you test and correct your soil first. If your soil is acidic or alkaline, it’s unlikely overseeding will give you the results you want.
3. Add the Right Fertilizer
Just like all plants, your lawn needs to be fed. Rainfall and watering leach away necessary nutrients, so to make sure your lawn has everything it needs, regular fertilization throughout the summer helps promote healthy growth.
Look for a fertilizer that has both slow and immediate release nitrogen. The slow-release type feeds your lawn over about three months while the immediate release can be used by your lawn right away.
The Next Phase
Once you’ve made the necessary changes to your soil and have allowed the overseeding to grow in, your lawn should begin looking thicker and greener. Now that you have the lawn that you wanted, you have to take care of it to make sure it stays that way.
4. Water Your Lawn Appropriately

When things start heading in the right direction, good lawn watering practices will help the new growth continue to thrive. New seeds need constant moisture to germinate, so make sure you begin watering more after you overseed.
After your lawn is a little more established and the new growth has filled in, lawns generally need about an inch of water every week. If you live in a wet climate, you might get this from rain, at least during some weeks. If not, use a garden hose or sprinkler system to maintain growth.
Irrigation systems are extremely effective, too, because they provide deep, thorough watering that encourages the grassroots to grow deeper, stabilizing the lawn.
Pay close attention to the grass seed that you choose when overseeding your lawn. Some grass types are more tolerant of dry conditions. If you live in an area that doesn’t get a lot of rain, choosing one of these varieties can help your lawn stay green, even if it doesn’t rain for weeks at a time.
5. Mow Your Lawn the Right Way
Don’t look at the calendar to determine when it’s time to mow, look at the grass itself. Ideally, you should never remove more than a third of the total height of the lawn in a single mowing. If you cut off too much, it can stress the grass which affects future growth.
How you mow your lawn matters, too. Wait until the grass is dry, from both rain and dew. You might prefer to mow your lawn in the morning before it gets too hot outside, but this isn’t what’s best for the grass.
Wet grass can clog the lawnmower, so you’ll have to keep stopping to remove lumps of grass. You won’t have as much traction, which means you have less control. If you wait until later in the day, you can work more effectively without risking damage to your mower.
Let your grass grow a little longer. Ideally, it should be about four inches long when freshly cut. A lot of people think this is too long, but longer grass stores more moisture and grows stronger roots, both of which are needed for a thick, green lawn.
Take your time to make sure every blade is cut to the same height, and mow in a pattern so you don’t miss any areas. Keep the lawn mower blade sharp, too. This creates a clean cut which is much better for your grass than a ragged edge.
6. Manage Weeds Aggressively
Weeds compete with your grass for water, sunlight, and nutrients so getting them under control is essential to having a green, thick lawn. The more weeds you have, the less nutrition your grass receives.
Think of it this way. You spent a lot of time getting your soil right, overseeding, and mowing, for what? To help the weeds thrive? All of your work up until this point won’t be successful if weeds take over.
The best time to go after the most common weeds is in the early fall. Use a pre-emergent herbicide to help kill the weeds before they come out in the spring if your lawn is established. If you use this type of fertilizer when overseeding, it will prevent the seeds from germinating.
Take Your Time to Get It Right
The takeaway is that making a lawn green and thick is not difficult, but it does take a bit of time and patience. Starting the process with a soil test and correcting soil pH when necessary are keys to the rest of the process working. If you don’t have a good foundation for your grass to grow, you won’t be able to get the results you want.


Leave a Reply